
Proper Hook Inspection: A Complete Safety Guide for Hoist Users
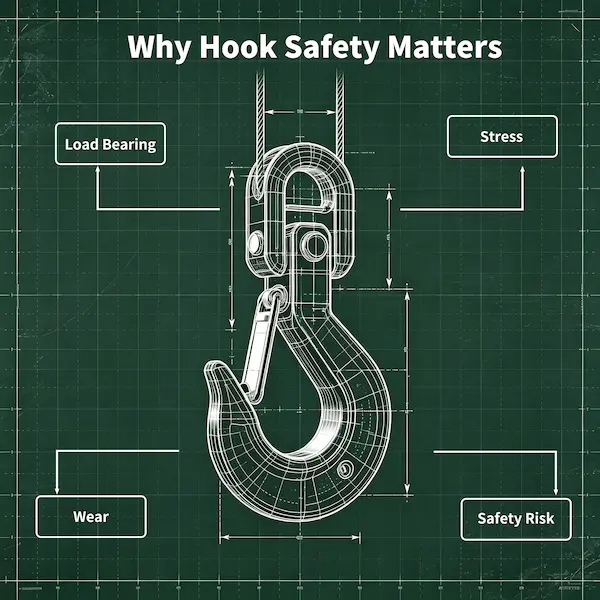
Section 1: Why Hook Inspection Matters
In overhead material handling, the hoist hook is the single critical component linking your lifting equipment to the payload. Whether operating a fixed electric chain hoist in a busy manufacturing plant or a manual block in a remote workshop, the hook continuously bears severe tensile forces, dynamic shock loads, and repeated stress during every operational cycle.
Neglecting routine hook evaluation can lead to unseen stress fractures, subtle deformation, and ultimate failure. According to occupational safety studies, uninspected rigging hardware is a primary cause of major overhead handling accidents. Understanding and executing proper hook inspection prevents:
- Catastrophic Load Drops: Unexpected slipping or structural snapping of deformed hooks.
- Workplace Injuries: Severe hazards to riggers and floor technicians working within the drop zone.
- Equipment & Load Damage: Costly downtime caused by dropped inventory or damaged machine parts.
- Regulatory Non-Compliance: Heavy fines for failing OSHA, ASME B30.10, or ISO safety audit requirements.
To avoid dangerous operational hazards, operators must also familiarize themselves with common lifting mistakes that accelerate mechanical wear on load hooks.
Section 2: Understanding Hoist Hook Structure
Before conducting a safety audit, rigging crews and maintenance managers should understand the key anatomical components of an industrial drop-forged steel hook.
1. Hook Shank
The threaded or smooth upper stem connecting the hook body to the load chain, wire rope swivel, or bearing block inside the hoist frame.
2. Hook Body & Saddle
The heavy curved section. The saddle is the thick base of the bowl where rigging slings or master links sit directly during a lift.
3. Throat Opening
The clear entry distance between the hook tip and the inner curve of the shank, allowing easy attachment of slings.
4. Hook Tip & Safety Latch
The pointed terminal end of the hook. The spring-loaded safety latch spans across the throat to keep rigging hardware securely captive.
Section 3: When Should You Inspect a Hook?
The required frequency for a hoist safety inspection depends directly on equipment usage, duty cycle, and operating environmental conditions.
- Frequent Operational Inspection (Pre-Shift): A daily visual check conducted by the equipment operator before every shift to identify obvious cracks, missing latches, or severe deformation.
- Periodic Detailed Inspection: A thorough hands-on dimensional evaluation performed by a designated technician every 1 to 12 months, depending on service severity (Normal, Heavy, or Severe duty).
- Immediate Post-Incident Inspection: Mandatory inspection performed immediately after abnormal operational events such as accidental overloading, severe shock loading, side-pulling, or physical collision.
Section 4: Step-by-Step Hook Inspection Process
Follow this systematic 5-step protocol during your maintenance rounds to ensure thorough hardware evaluation.
Step 1: Visual Inspection for Surface Defects
Clean all grease, dirt, and chemical buildup from the hook using a industrial degreaser. Carefully examine the entire surface for hairline cracks, rust pitting, gouges, or severe corrosion. Pay close attention to the saddle area and the transition fillet near the shank.
Step 2: Check Hook Opening & Twist
Measure the current throat opening against manufacturer baseline parameters stamped on the hook or documented in the equipment manual. Inspect visually from the tip along the shank line to check for lateral twisting.
Step 3: Test the Safety Latch Function
Manually press the safety latch. It should spring back firmly against the hook tip when released. Verify that the latch bridge closes completely without binding, sticking, or bending sideways.
Step 4: Verify Swivel & Hook Rotation
Rotate the hook 360 degrees manually. It must spin smoothly without grinding, excessive play, or axial binding. Check the internal thrust bearing for lack of lubrication or grit contamination.
Step 5: Inspect the Connection Area & Shank
Inspect threads, retaining nuts, cotter pins, and swivel housing. Ensure the connection thread shows no stripping, metal shear, or thread stretch.
Section 5: Common Hook Damage Signs & Rejection Criteria
If a hook exhibits any of the following 5 damage indicators, it has failed inspection and must be tagged out and replaced immediately.
🚨 Critical Safety Alert: Zero Welding / Heating Policy
Never attempt to weld, heat, reshape, or repair a damaged hoist hook. Heat treatment applied during forging gives alloy hooks their ductility and strength. Heating or welding destroys this grain structure, leading to brittle, sudden fracture under load.
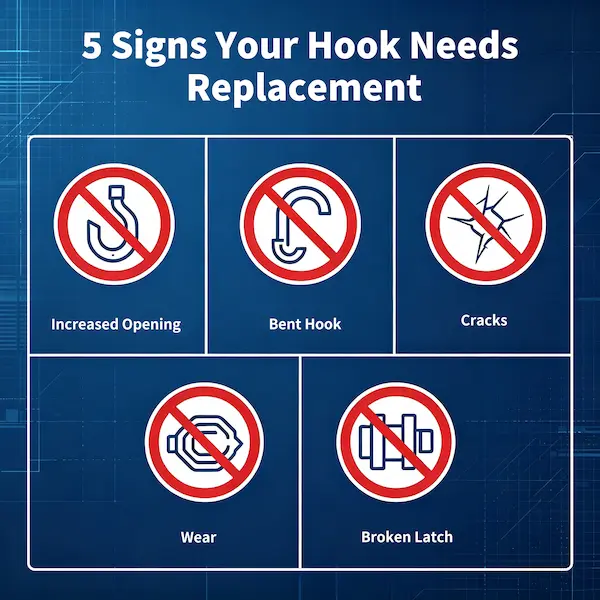
- Increased Throat Opening: Caused by overloading or shock loads pulling open the hook bowl.
- Bent or Twisted Hook Body: Resulting from improper side pulling or rigging loads onto the tip rather than seating in the saddle.
- Surface Cracks or Gouges: Caused by metal fatigue, sharp-edge friction, or severe environmental corrosion.
- Excessive Wear in Saddle or Shank: Material loss in the load-bearing saddle exceeding 10% of original cross-sectional thickness.
- Broken or Missing Safety Latch: Inoperative or spring-damaged latches that fail to stay closed against the tip.
Section 6: Measuring Hook Opening Correctly
Visual checks alone are insufficient to detect minor structural stretch. Precise measurement using calipers or trammel points is mandatory.
Locate the punch marks (Dimension ‘A’) stamped by the manufacturer near the hook tip and throat fillet. Use a vernier caliper to measure the distance.
Standard Rejection Limits (ASME B30.10 & ISO Standards):
- Throat Opening Expansion: Any increase exceeding 5% (or 1/4 inch / 6mm) of original dimension requires immediate replacement.
- Hook Body Twist: Any rotation or lateral bend exceeding 10 degrees from the plane of the unbent hook requires immediate replacement.
- Saddle / Shank Wear: Any wear exceeding 10% of original nominal section thickness mandates replacement.
Section 7: Printable Hook Inspection Checklist
Incorporate this practical checklist into your facility’s daily maintenance routine:
☑️ Pre-Operational Hoist Hook Safety Checklist
Section 8: Common Hook Inspection Mistakes
Even experienced maintenance teams sometimes make critical oversights during safety inspections:
- Relying Solely on Visual Estimation: Minor 5% throat stretches are virtually invisible to the naked eye but drastically reduce ultimate hook strength. Always use precise calipers.
- Ignoring Small Cracks: Micro-fractures on forged steel quickly propagate into complete failure under cyclical dynamic loading.
- Operating with Broken Latches: Assuming a latch is “optional.” Unlatched slings can easily jump off the hook tip during slack conditions.
- Failing to Record Inspection Logs: Neglecting written documentation makes tracking cumulative wear rates impossible and creates audit non-compliance.
Integrating hook audits with proper hoist chain lubrication maintenance ensures total system reliability.
Section 9: Hook Maintenance & Care Tips
Extend the operational lifespan of your hoisting gear with these proactive maintenance best practices:
- Keep Surfaces Clean: Wipe away oil grit, metallic dust, and corrosive residues after each shift.
- Lubricate Swivel Bearings: Apply heavy-duty machinery grease to swivel bearings periodically to prevent binding.
- Store Equipment Correctly: Hang hoists off the floor in dry, clean locations to prevent chemical pitting and corrosion.
- Avoid Tip Loading: Always seat rigging shackles and master links squarely in the center of the hook saddle.
Section 10: How KYLIFT Ensures Hook Quality
At KYLIFT (operated by Hebei Shoupai Hoisting Machinery Manufacturing Co., Ltd.), safety is built into every lifting product we manufacture.
Every load hook supplied across our manual chain blocks, mini hoists, and heavy-duty electric chain hoists undergoes rigorous quality control procedures:
- Forged High-Strength Alloy Steel: Drop-forged from premium heat-treated alloy steel for maximum toughness and gradual deformation warning (bending rather than snapping under extreme overload).
- 100% Non-Destructive Testing (NDT): Magnetic particle and ultrasonic flaw testing to eliminate micro-cracks before assembly.
- 125% Factory Proof Load Testing: Every hoist is tested beyond its rated capacity in accordance with our rigorous factory quality control process.
- Heavy-Duty Reinforced Safety Latches: Ergonomic, spring-loaded steel latches designed for intensive industrial environments like workshop maintenance, shipyard operations, and heavy warehouse material handling.
Frequently Asked Questions (FAQ)
Q1: How often should hoist hooks be inspected?
Hoist hooks must undergo a visual pre-operational inspection before every shift. Thorough periodic inspections (monthly to annually) should be conducted by a qualified person based on duty cycle, environment, and severity of use.
Q2: When should a hoist hook be removed from service?
A hook must be taken out of service immediately if it shows throat opening exceeding 5% (or 1/4 inch / 6mm), twist or bend exceeding 10 degrees, visible cracks, wear exceeding 10% of original dimensions, or a malfunctioning safety latch.
Q3: Can a bent or cracked hoist hook be repaired by welding?
No. Never attempt to weld, heat, reshape, or repair a damaged hoist hook. Welding alters the metallurgical structure and heat treatment of forged alloy steel, causing catastrophic failure under load. Damaged hooks must always be replaced.
Q4: What is the function of a safety latch on a hoist hook?
The safety latch bridges the throat opening of the hook to prevent slings, chains, or load attachments from accidentally slipping off during slack rope conditions, dynamic movements, or off-center positioning.